lets connect:

Instagram

Wednesday, March 26, 2014

are you giving your makeup brushes enough love.

Hi!

Today's blog post is EXTREMELY IMPORTANT!
Before we get started, I want you to answer this question...
Are you giving your makeup brushes enough LOVE???

[[DID YOU KNOW?]]

The bristles in your makeup brushes are an excellent breeding ground for bacteria?! Researchers have found many different forms of bacteria when studying makeup brushes closely. The bacteria is then placed on your skin when applying makeup (when your brushes aren't clean) and can enter into the blood stream via a pimple or a cut, and can cause major internal damage! Now, I'm not saying this WILL happen if you don't clean your brushes....but who wants to risk it??

Another MAJOR reason for cleaning your brushes besides avoiding disease through bacteria entering your body is to avoid ACNE! Have you broken out for no reason at all? You haven't switched makeup, you wash your face morning and night, and it's not "that time of the month"? Then ask yourself, "when was the last time I cleaned my brushes?" 9/10 that is the cause of your unexpected, no reason at all, breakout. Like I said before, there is bacteria growing in your makeup brushes as well as lots of build up of old makeup, and when you are continually applying makeup with those dirty brushes, the bacteria is entering your pores causing them to clog with bacteria. [enter pimple] YUCK!

Need yet another valid reason for giving your makeup brushes some love? Makeup brushes are expensive! They are definitely an investment, and who doesn't like to take care of their expensive investments?? [I know I do!] Cleaning your makeup brushes is essential in making them last.

So on that note... I am going to show/tell you how I maintain my makeup brushes.
[don't get me wrong, there are times where I am guilty of neglecting my brushes..but I told myself I'd be better about it..and so far I've stuck to my routine!] 
     
Getting started:
You will need:
  • dish soap (doesn't really matter the brand- I prefer using DAWN because it is gentle, just make sure it is a disinfecting & antibacterial one!)  
  • makeup brush cleaner (If you already have a makeup brush cleaner to use that is great! If not, the dish soap is a great alternative. If you don't have a specific makeup brush cleaner don't feel like you need to go buy one..the dish soap is going to be more affordable!)
  • a towel to lay your brushes on
  • a cup or bowl to soak your brushes in
  • a bowl with clean water -OR- do this near a sink [MUCH easier]  
  • olive oil [optional]
  • bar of soap [also another alternative if you don't have a makeup brush cleaner or dish soap]
  • a makeup brush cleaning glove, a cleaning sponge, or your hand. [these will be the way you make sure you're getting a nice deep cleaning of your brushes]
And that's it!

For my example I used:
- MAC makeup brush cleaner (to show one way of cleaning them)
- DAWN dish soap [antibacterial] (to show an alternative way to clean them)
- a towel
- a cup with lukewarm water
- a sink with lukewarm water
- my hands to scrub the bristles
- my dirty makeup brushes


side-note: I didn't use olive oil this time, but I do use it probably every other time I clean my brushes. The soap will strip some of the oil from your brushes. The olive oil on natural hair brushes helps to restore the oil in them. Olive oil will NOT work on synthetic hair brushes, so it is not necessary to use on those. Olive oil is also great to use on brushes that you use for oil based products because oil gets rid of oil! (your lipstick brushes, gel eyeliner brushes, etc) Plus it conditions the bristles making your brushes really soft!

Okay so first thing I did is wipe down my counter-top and sink area. It is important to have a clean area to work!!
Next I laid out all of my brushes onto my towel.(TIP: when you are finished cleaning and ready to lay your brushes back on your towel turn the towel over so there is no cross-contamination onto your newly disinfected brushes! Or use a new towel.)
  
I then filled my glass up with a little bit of lukewarm water and poured my MAC solution into that.{IMPORTANT TIP: do not fill your glass too high. You do NOT want the water to go above the ferrule, or the silver connecting piece that holds the handle of the brush and the tip of the brush together. If this area gets too much water in or around it, the glue can be broken down which will cause your brush to come apart or the bristles in the brush to shed or become loose.) 
This is the ferrule I was talking about. You don't want to get water or soap near this area. Focus on the area where the bristles are ONLY.

Next I washed my hands to make sure they were nice and clean.
I then put a few of the makeup brushes into the glass cup. (making sure they weren't too deep in there..you only need them to soak the bristles) I usually swirl them around in there to make sure they are fully soaking.

I then grabbed some of the other brushes and applied some of the dish soap directly onto the bristles and began to swirl them around on the palm of my hand and also on my fingers to give a different texture. This helps to make sure you're getting deep into the brush.
 Make sure your brush is completely clean before you are finished. Sometimes from the outer layer it looks clean [pictured above], so gently pull the bristles outward to check to make sure the inside is cleaned. [as you can tell from the picture below this shows the inside was not quite cleaned out] It is okay to turn your brush upward like this to quickly check in the middle of the brush, but DO NOT put it under the water while it's facing up. Be sure and always wash the brush facing down so that water doesn't get in there and break down the glue!


I will even take a drop of soap and put it in the palm of my hand and twirl my brush in that to get all of the product out. [pictured above. I wish I had more hands so I could take a picture of me really doing this. I use my other hand to swirl it, not just one hand like the picture makes it look. haha] Do this, and rinse, and do it again until your soap is only white after swirling your brush in it. ALWAYS do a nice long rinse on your brush after you've scrubbed it to make sure all of the soap is off! Then squeeze the bristles to ring out the water. I followed the same rinsing and swirling steps with the brushes that were soaking in the MAC solution. If you feel like they still have makeup on them you can pour some of the solution directly onto the bristles and scrub again.

Next I reshape the brush to how it was before. This is important because your brush will dry however you leave it..and wont go back to its normal shape on its own!


I then begin to lay my brushes so that the bristles are hanging out over the edge. [pictured above] I do this for two reasons. One, so that the air can circulate all around them and get them nice and dry, and two..so that I don't have to keep turning them every so often so they don't dry funny. This allows them to keep their shape and dry quickly! I usually let mine dry overnight. [tip: always pick a good time to deep clean your brushes...not when you are going to need to use them immediately!] If you see that your brushes are really dirty but you need to be using them and don't have time to let them dry, use a makeup brush cleaning spray. Most [if not all] makeup stores carry these...as well as some drug stores. 

Then you are done!
This took me probably close to 30 min, but I have quite a few brushes!! My next purchase is going to be this lil guy:
This is the makeup brush cleaning glove I was talking about earlier. It's from SIGMA, and I'm pretty sure it would change my life. It is textured for different brushes and also keeps your hand from getting all dirty and irritated from all the makeup, soap, and water! From the videos I've watched on this bad boy I am sold because everyone says it speeds up your cleaning time! And that is the one reason I will sometimes neglect cleaning my brushes is that it can be time consuming! So, if you're like me and have lots of brushes [and counting... haha] this might just be a good purchase for you too! They are a little spendy, so I am waiting to find a good deal. You can get them on SIGMA's website..and also on Amazon!
  

I also have had my eye on one of these for a while now! How great is this brush holder?? It would take up less counter space then the towel with brushes everywhere..hanging out over the edge [which I'm sure my husband would LOVE..haha oops!] while you are waiting for them to dry, plus it holds them upside down so that no water is draining into the ferrule! It's pure genius. And definitely affordable. I want to say in the $30-$40 price range. You can get one of these at:
 http://www.benjabelle.com/products/original-brush-tree   

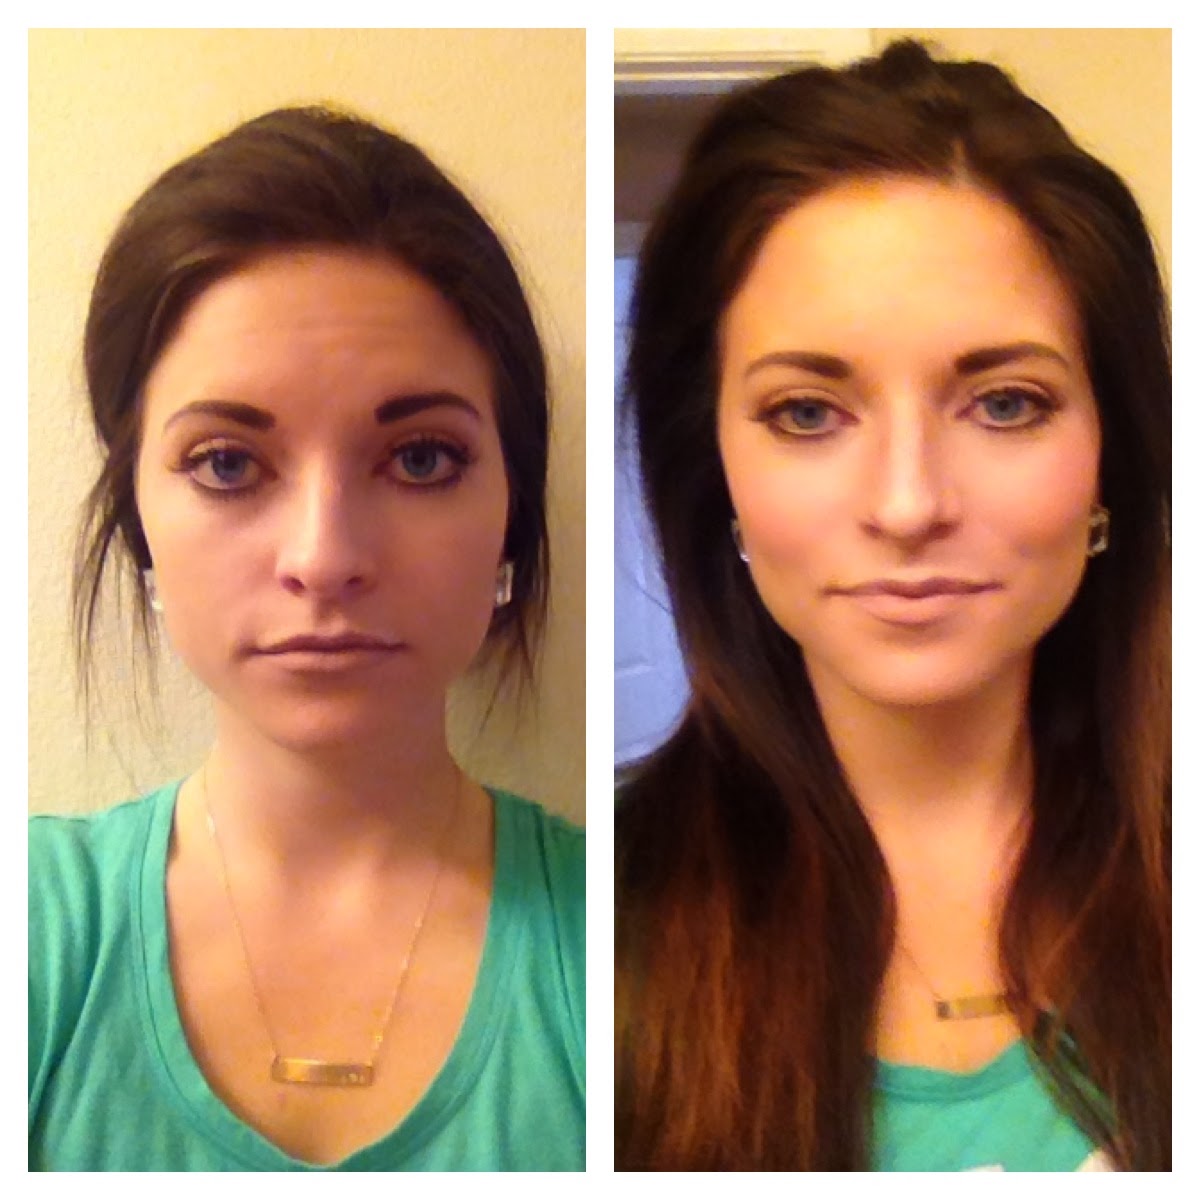
Alright friends, that's all I have for today! I hope this was helpful. Let me know if you have any questions when it comes to giving your brushes enough TLC. Like I said, I usually deep clean my face brushes once a week and my eye brushes once a month! Don't forget to spot clean them after each use. If you feel like you have been neglecting your makeup brushes...start showing the love today! Just look how much better and happier they look! PLUS your skin will thank you!

  BEFORE:
 AFTER:


YOU ARE BEAUTIFUL. So have a beautiful day!

xoxo,
ALEXA


Friday, March 7, 2014

I mustache you a question.

Hi friends!

So, I have something so great to blog about today!
Firstly, who here thinks it is okay for women to have a mustache? Or any unwanted facial hair for that matter? I do! [said no one ever]  

I know for me I feel like I am constantly needing to wax my brows, or my "stache", or any unwanted facial hair....(we are being honest here. and every woman has facial hair so we can be open and honest about this! haha) and sometimes I just want something quick and easy to remove the hair without having to warm up my wax and get all the supplies out. (or in your case make an appointment to get waxed). Or I don't want my face to be red from tweezing if I am needing to go out that day.
I HAVE FOUND A SOLUTION.
Note: this is not to replace being waxed, but merely a solution to get you by in a jam when you find you are seeing some unwanted hair...and your next wax appointment isn't for a while! 

Introducing...
Found at Sally Beauty Supply, Walmart, Target

Find this huge box at Amazon!
These are actually called "Twinkle". I am pretty sure the picture above is the same product, but they have different names, so I don't know if they changed names or what. They are the same thing. Both great. Also found on Amazon.


 Now, I know what you're thinking. It's going to make me grow back darker hair. It won't. The hair is going to grow back like whiskers. It doesn't. Those are myths. TRUST ME. I've done this on my own face. I did my brows, my lip, my jawline, and on my neck (under the ear area where most women have lots of "peach fuzz". And guess what, I don't have a beard or a mustache! Hooray! When it grows back it looks exactly the same as it did before. No dark bristly whisker hairs. Just the regular peach fuzz. And now with the purchase of my new found friends, I don't have to have unwanted hair!

You can use these:
  • on your face (brows, lip, jawline, chin, neck, etc)
  • on your bikini line (bring on summer!)
  • on your tummy
  • on your knuckles
  • on your tops of your feet and toes
  • inside your nose (this is the BEST)
basically, anywhere you have UNWANTED hair.

Now, lets be practical here. You obviously aren't going to use one of these to shave your entire legs. It is going to be much quicker to use a normal razor for that. But these are just so handy for when you notice you have some unwanted hairs that need taken care of ASAP. 

***ATTENTION: do NOT use a regular razor on your face.
These special razors are made specially for your face and areas that you do not want dark coarse hair to grow back, so use these instead!
The pack of facial razors that I bought I got at Walmart. Super cheap. Like maybe $3.00. And the pack comes with THREE. (Yes, you do need to change over to a new one once you've used it up a few times because like a normal razor, the blade gets dull.) Which is why my next purchase is going to be the TWINKLE -or- TINKLE (whichever one it is now) brand...and I'm going big and buying the huge box. THAT IS HOW MUCH I LOVE THESE. 
I read lots of blogs of girls who use these and that is what sparked my interest. Maybe I will let my 'peach fuzz' grow back and do a video of me using them to show you. You will die. It is so crazy how much hair we really have. I don't really notice mine until I'm either in the right light, or its starting to show in my makeup. (that's the worst, right?) So gross I know. It's embarrassing. That's why I'm sharing. To help a sista out! GET RID OF THE FUZZ!

BONUS: these razors double as an exfoliation to your skin! WHY WOULDN'T YOU LOVE THEM?
After you do this, your face will feel so amazing and smooth! And your makeup goes on and looks flawless. I don't really have a 'schedule' of how often I do this. I do it when I notice hair that I don't want. Sometimes I find myself doing it every week on different areas, but I wouldn't say it is necessary to have to do it every week. This shouldn't become a chore. These are awesome tools to help you quickly remove hair when you are in a rush and need it gone! Comment below if you have questions!

Try it out....see what you think!

xoxo,
ALEXA   

Thursday, February 6, 2014

contour & highlight.

HELLO AGAIN!

Today's post is on (basic) HIGHLIGHTING & CONTOURING!

I love this topic! Before we get into it, I feel it is first important to identify and understand our face shapes. What does that mean? Take a look at this diagram I found that does a pretty good job at explaining the various face shapes.
Identify which shape you are:

  Honest truth moment: I have never liked my face shape. I have a square face shape. Remember though, I said this was no place for negativity, so we will not dwell on what we don't like about ourselves, and focus on the positives! Ever since learning some highlighting and contouring tips, I have been able to highlight the features I do like, and contour the features I wish were less defined. This has made me really come to love my face shape! Doesn't make sense? Let me show you some pictures of what I mean..


For the first picture..the lighter more purple areas are the areas you want to highlight. The darker more pink areas are the areas you want to contour. I know that the diagram pictures are sort of hard to picture in real life, so I  took some step by step pictures [aka awkward selfies] while contouring and highlighting my own face. [if you would like a video on how to do this instead of pictures comment below and I will see if I can figure out how to upload it on here] TIP: Just think of it like you would an outfit to help you remember which areas to highlight and which to contour. The lighter/whiter colors make you look larger and the darker/ black colors make you look smaller. The same goes when highlighting and contouring! Highlight with a lighter color to accentuate those areas you want to appear larger, and shade with a darker color to make certain areas appear smaller. (you can look like you lost 5lbs without really losing 5lbs because it is so slenderizing ! HELLO! Amazing.)

Here are the steps that I did for contouring & highlighting my face:
Note: I tried to use only drug store products to give you an idea of what products you can buy (for cheaper!) to still achieve this look! The lighting is terrible in my bathroom and gave off an orange-ish tint to my pictures. I promise it was only the lighting and that the makeup from the drug store was actually a good match!
step one:
foundation your face normally.  (I already did my eyebrows, eyes, and lips because this is a highlight and contour only post!)
(don't judge my hair....it has seen better days!)

  • I used L'Oreal True Match [nude beige W3]
  • this gives you a nice, even skin tone all over so that you are ready to add dimension back...this time where you want it! 
step two: 
add your [darker] contour color, and your [lighter] highlight color to correct areas
Mugshot anyone? ^
 This side is with powder^
This side is with the concealer stick^
 Nose job...with makeup! ^
These are the two colors I used to contour & highlight. [Note to self: I will buy one shade darker next time..I felt like it was a little too light]

  • You can use a much darker shade of liquid foundation to achieve this, concealer sticks, or a matte powder [you will want to go 2-3 shades darker than your skin tone for your contour color...I know it seems crazy, but it all blends nicely I promise!]
  • I used a matte powder [MAC matte bronzer] on one side and a concealer stick [Covergirl trublend fix stick] on the other to show you two options.
  • If you follow the highlighting and contouring pictures I posted earlier you will be able to find the correct areas to apply the contour and highlight for your face shape. For me, I want to add a "shadow" with my contour right underneath my cheek bones to make my jaw area appear smaller and my cheek bones more defined. (since I have a square face shape) You also want to blend the contour color up around your hairline to give a nice natural blended look. (you can also bring your contour lines more inward on your forehead if you have a larger forehead and want it to appear smaller) I also contour around my jawline to shade it down as well. 
  • Then on to my favorite part...the "nose job"! This is such an easy, painless, cheap trick to give you the appearance that you have a smaller nose! [without going under the knife!] Marilyn Monroe used this handy little trick! This is my favorite part because you can do it as dramatic or subtle as you would like. Just trace the bridge of your nose on each side with your darker color to give shadow [the closer you bring the lines the smaller your nose will look] and use your highlight color and trace a straight line down the middle of your nose. As you can see from the pictures, I start almost up at my eyebrows with the darker color, and bring the lines all the way down to the tip of your nose and then bring the dark lines into almost a 'V' at the tip. Depending on how close you bring those in will make your nose look longer or shorter. 
  • I used my highlight color on the top of my nose in a straight line, and brought that up and branched out in-between my eyebrows. I also highlight underneath my eyes in a triangle shape from the corner, along the nose, and out to the top of my cheek bone. (I didn't really snap a good picture of that...sorry!) And then I also added some highlight to my chin to make it stand out and make my face appear longer. You can also add highlight to underneath your brow line to make your brow bone appear more defined. I also like to highlight underneath my nose and above my upper lip to bring that area out, and then I contour underneath my lip with just a small, almost U shape to make my bottom lip appear larger.
step three:
blend, blend, blend!

  • you can use your fingers, a concealer brush, or a blending sponge! (I used my beauty blender egg sponge..it works amazingly!) I recommend one of these to anyone, because even just blending out your base foundation.. this sponge does wonders!
step four:
use an all over powder to set everything
I used L'OREAL Hydra Perfecte- Perfecting Loose Powder [color: translucent]

  •  if you don't do this, you will sweat off your makeup and/or it will be rubbed off within hours
  • You can use a colored powder [loose or pressed] if you want to add more color, but I didn't want to add anymore color so that is why I used translucent. (plus it is good to have because this color works on everyone)
step five:
go over your contour and highlight areas with powder to reinforce the work you just did!

  • I used the brand E.L.F's contouring palate (you can get this at Target or Walmart..and it's cheap!) You can also use a bronzer to go over these areas. [I'll be honest, I wasn't overly impressed with this contouring kit. I wouldn't buy it again, but it was cheap and did an okay job. So if you are on a budget it works..but if you have a little more to spend, buy a nicer contouring kit. (message me for recommendations on which kits to buy!) It will make a difference!
  • go over those areas (under cheekbone, around hairline, forehead) with the darker color, and with the light color highlight those areas you did before (above cheek bone, down the center of the nose, between eyebrows/lower forehead, chin)
  • this helps to just add a little more dimension and really lock everything in! 
step six:
apply BLUSH!
again, I used ELF brand [color fuchsia fusion]--but I actually liked this blush a lot!

  •  using a blush brush (or your fingers depending on the amount desired) apply blush
  • I really only like to apply blush to the apples of my cheeks and then lightly blend up [if you are going for different looks however, some require you to apply blush to the entire cheek bone]
  • this gives off a vibrant, young, healthy look to your skin and really finishes everything off!
     look at that cheek bone! (that I just created...shh)
     Mugshots....aren't they AWESOME? ^ (I really wanted you to be able to see the contour without me smiling though)

    don't you just love the blush color??

     before & after ^
    (my forehead looks orange in these from my terrible bathroom lighting but I promise it is the same shade as the rest of my face. haha)
     before & after ^

AND YOU ARE DONE! 
Any questions? Comment below and I will try to answer them!

Alright, I am DONE taking "selfies" for the day...phew! I hope these tips helped..now go try it out and see what you think!         
xoxo,
ALEXA
different lighting to really show the shadows the contouring makes! Notice under my cheek bone how it created a shadow making my jawline look more slender. I LOVE CONTOURING! haha

when life gives you lemons.

USE THEM ON YOUR FACE!


You guys, I LOVE LEMONS! And now- having learned about using lemons on my skin I love them even more. I think it is safe to say that we all know how taking lemon orally (like squeezing it into our water!) has it's benefits (including benefits for your skin)...but did you know you can apply it topically to your skin?

I know, was a skeptic at first too. Lemons are super acidic, and so I was hesitant at first, but I've done it for a week now and I am sold! I love it. My skin is glowing, my pores are almost completely hidden, my skin feels tight, and my frustrating blemishes that always seem to appear...gone! It sounds crazy, I know. But trust me on this one..my skin feels amazing!!
I went ahead and did some research for you guys in case you are skeptics like I was..

BENEFITS of LEMON on your SKIN:
  1. Vitamin C, calcium, magnesium
  2. Skin lightening
  3. Heals acne and scarring
  4. Skin tightening
  5. natural antibacterial
  6. improves overall appearance and condition of skin
  7. Remove blackheads
  8. Gets rid of oily skin
  9. Cleanses the skin..and makes your skin SO soft!!
  10. Anti-aging benefits (contains AHAs & BHAs that exfoliate your dead skin cells making your skin look brighter and younger!)

 Here is what you do...

  • Slice a lemon in half (squeeze some of the lemon juice into a glass..this helps to get the lemon juice to spread better)
  • if you are needing a nice exfoliation as well, dip the lemon into some sugar (I used brown sugar)
  • wet your face with warm water (to open your pores) and then rub it all over your face! (you can also squeeze the lemon juice onto a cotton round and rub it on that way.
  • Use the leftover lemon juice in the glass by adding it to your ice water to get extra benefits!
  • you can also use a bottle of lemon juice, and just pour some onto a cotton round as well (I've done this method as well and the results are the same!)
  • leave on for 5-10 min and then rinse off with cold water
  • tip: if you have a trouble spot that you are working on (ie a dark age spot, acne spots, stubborn blackheads, etc) you can put some lemon juice on it and leave it on over night. Rinse with cold water in the morning. DO NOT leave on over night if you put it all over your face.
  • MAY CAUSE SKIN SENSITIVITY- avoid sun exposure immediately after doing this. (and don't forget sunscreen when you do go out into the sun! But you do this all the time right?)
  • you can also find recipes online for making lemon masks, lemon sprays, using lemon on your hair, nails, etc. (this way is the quickest and easiest way...my favorite! But some of the masks and scrubs do look fun!)
  • extra benefit- it smells so good while its sitting on your face!
  • some activity (tingling or burning) is normal, but if it is too much for you, you can dilute the lemon juice with water
So..give it a try! Let me know what you think and what your results are! I have been doing this every morning for a week (on my trouble spots I have been hitting them morning and night) and have definitely noticed a difference in my skin! I am going to continue doing it for another week to reach the results that I want, and then I will probably take it down a notch and maybe do it every other day...or even just once a week. It is important to remember that lemons have antioxidant properties so your skin might get worse before it gets better. BE PATIENT with it. It is just detoxing and forcing those impurities out that are necessary to get rid of so you can achieve flawless skin. [SO WORTH IT] It will also help to be drinking LOTS of water to help with this process. This is a cheap and easy way to give your skin a nice exfoliation and a natural and healthy looking glow! Have fun with it!

xoxo,
ALEXA