HELLO AGAIN!
Today's post is on (basic) HIGHLIGHTING & CONTOURING!
I love this topic! Before we get into it, I feel it is first important to identify and understand our face shapes. What does that mean? Take a look at this diagram I found that does a pretty good job at explaining the various face shapes.Identify which shape you are:
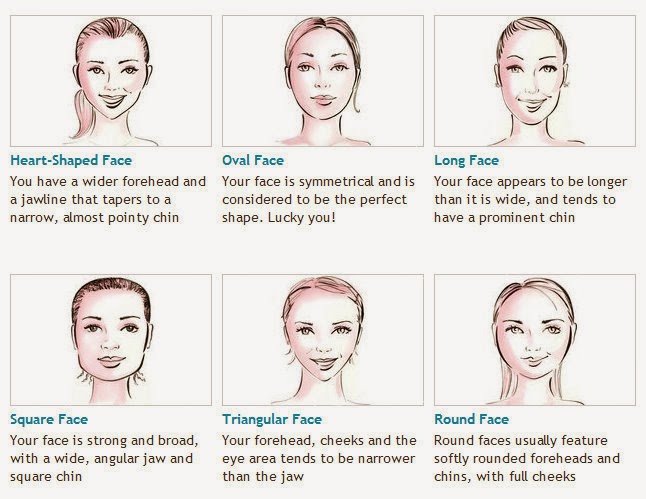
Honest truth moment: I have never liked my face shape. I have a square face shape. Remember though, I said this was no place for negativity, so we will not dwell on what we don't like about ourselves, and focus on the positives! Ever since learning some highlighting and contouring tips, I have been able to highlight the features I do like, and contour the features I wish were less defined. This has made me really come to love my face shape! Doesn't make sense? Let me show you some pictures of what I mean..


For the first picture..the lighter more purple areas are the areas you want to highlight. The darker more pink areas are the areas you want to contour. I know that the diagram pictures are sort of hard to picture in real life, so I took some step by step pictures [aka awkward selfies] while contouring and highlighting my own face. [if you would like a video on how to do this instead of pictures comment below and I will see if I can figure out how to upload it on here] TIP: Just think of it like you would an outfit to help you remember which areas to highlight and which to contour. The lighter/whiter colors make you look larger and the darker/ black colors make you look smaller. The same goes when highlighting and contouring! Highlight with a lighter color to accentuate those areas you want to appear larger, and shade with a darker color to make certain areas appear smaller. (you can look like you lost 5lbs without really losing 5lbs because it is so slenderizing ! HELLO! Amazing.)
Here are the steps that I did for contouring & highlighting my face:
Note: I tried to use only drug store products to give you an idea of what products you can buy (for cheaper!) to still achieve this look! The lighting is terrible in my bathroom and gave off an orange-ish tint to my pictures. I promise it was only the lighting and that the makeup from the drug store was actually a good match!
step one:
foundation your face normally. (I already did my eyebrows, eyes, and lips because this is a highlight and contour only post!)

(don't judge my hair....it has seen better days!)
- I used L'Oreal True Match [nude beige W3]
- this gives you a nice, even skin tone all over so that you are ready to add dimension back...this time where you want it!
add your [darker] contour color, and your [lighter] highlight color to correct areas

Mugshot anyone? ^

This side is with powder^

This side is with the concealer stick^

Nose job...with makeup! ^
 These are the two colors I used to contour & highlight. [Note to self: I will buy one shade darker next time..I felt like it was a little too light]
- You can use a much darker shade of liquid foundation to achieve this, concealer sticks, or a matte powder [you will want to go 2-3 shades darker than your skin tone for your contour color...I know it seems crazy, but it all blends nicely I promise!]
- I used a matte powder [MAC matte bronzer] on one side and a concealer stick [Covergirl trublend fix stick] on the other to show you two options.
- If you follow the highlighting and contouring pictures I posted earlier you will be able to find the correct areas to apply the contour and highlight for your face shape. For me, I want to add a "shadow" with my contour right underneath my cheek bones to make my jaw area appear smaller and my cheek bones more defined. (since I have a square face shape) You also want to blend the contour color up around your hairline to give a nice natural blended look. (you can also bring your contour lines more inward on your forehead if you have a larger forehead and want it to appear smaller) I also contour around my jawline to shade it down as well.
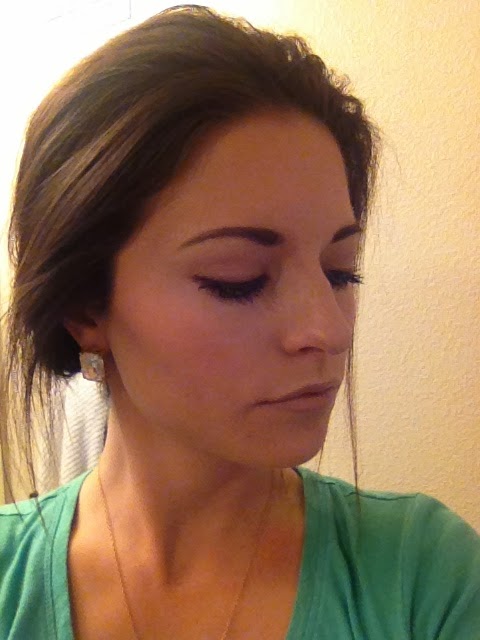
- Then on to my favorite part...the "nose job"! This is such an easy, painless, cheap trick to give you the appearance that you have a smaller nose! [without going under the knife!] Marilyn Monroe used this handy little trick! This is my favorite part because you can do it as dramatic or subtle as you would like. Just trace the bridge of your nose on each side with your darker color to give shadow [the closer you bring the lines the smaller your nose will look] and use your highlight color and trace a straight line down the middle of your nose. As you can see from the pictures, I start almost up at my eyebrows with the darker color, and bring the lines all the way down to the tip of your nose and then bring the dark lines into almost a 'V' at the tip. Depending on how close you bring those in will make your nose look longer or shorter.
- I used my highlight color on the top of my nose in a straight line, and brought that up and branched out in-between my eyebrows. I also highlight underneath my eyes in a triangle shape from the corner, along the nose, and out to the top of my cheek bone. (I didn't really snap a good picture of that...sorry!) And then I also added some highlight to my chin to make it stand out and make my face appear longer. You can also add highlight to underneath your brow line to make your brow bone appear more defined. I also like to highlight underneath my nose and above my upper lip to bring that area out, and then I contour underneath my lip with just a small, almost U shape to make my bottom lip appear larger.
blend, blend, blend!

- you can use your fingers, a concealer brush, or a blending sponge! (I used my beauty blender egg sponge..it works amazingly!) I recommend one of these to anyone, because even just blending out your base foundation.. this sponge does wonders!
use an all over powder to set everything

I used L'OREAL Hydra Perfecte- Perfecting Loose Powder [color: translucent]
- if you don't do this, you will sweat off your makeup and/or it will be rubbed off within hours
- You can use a colored powder [loose or pressed] if you want to add more color, but I didn't want to add anymore color so that is why I used translucent. (plus it is good to have because this color works on everyone)
go over your contour and highlight areas with powder to reinforce the work you just did!

- I used the brand E.L.F's contouring palate (you can get this at Target or Walmart..and it's cheap!) You can also use a bronzer to go over these areas. [I'll be honest, I wasn't overly impressed with this contouring kit. I wouldn't buy it again, but it was cheap and did an okay job. So if you are on a budget it works..but if you have a little more to spend, buy a nicer contouring kit. (message me for recommendations on which kits to buy!) It will make a difference!
- go over those areas (under cheekbone, around hairline, forehead) with the darker color, and with the light color highlight those areas you did before (above cheek bone, down the center of the nose, between eyebrows/lower forehead, chin)
- this helps to just add a little more dimension and really lock everything in!
apply BLUSH!

again, I used ELF brand [color fuchsia fusion]--but I actually liked this blush a lot!
- using a blush brush (or your fingers depending on the amount desired) apply blush
- I really only like to apply blush to the apples of my cheeks and then lightly blend up [if you are going for different looks however, some require you to apply blush to the entire cheek bone]
- this gives off a vibrant, young, healthy look to your skin and really finishes everything off!
 look at that cheek bone! (that I just created...shh)
 Mugshots....aren't they AWESOME? ^ (I really wanted you to be able to see the contour without me smiling though)
 don't you just love the blush color??
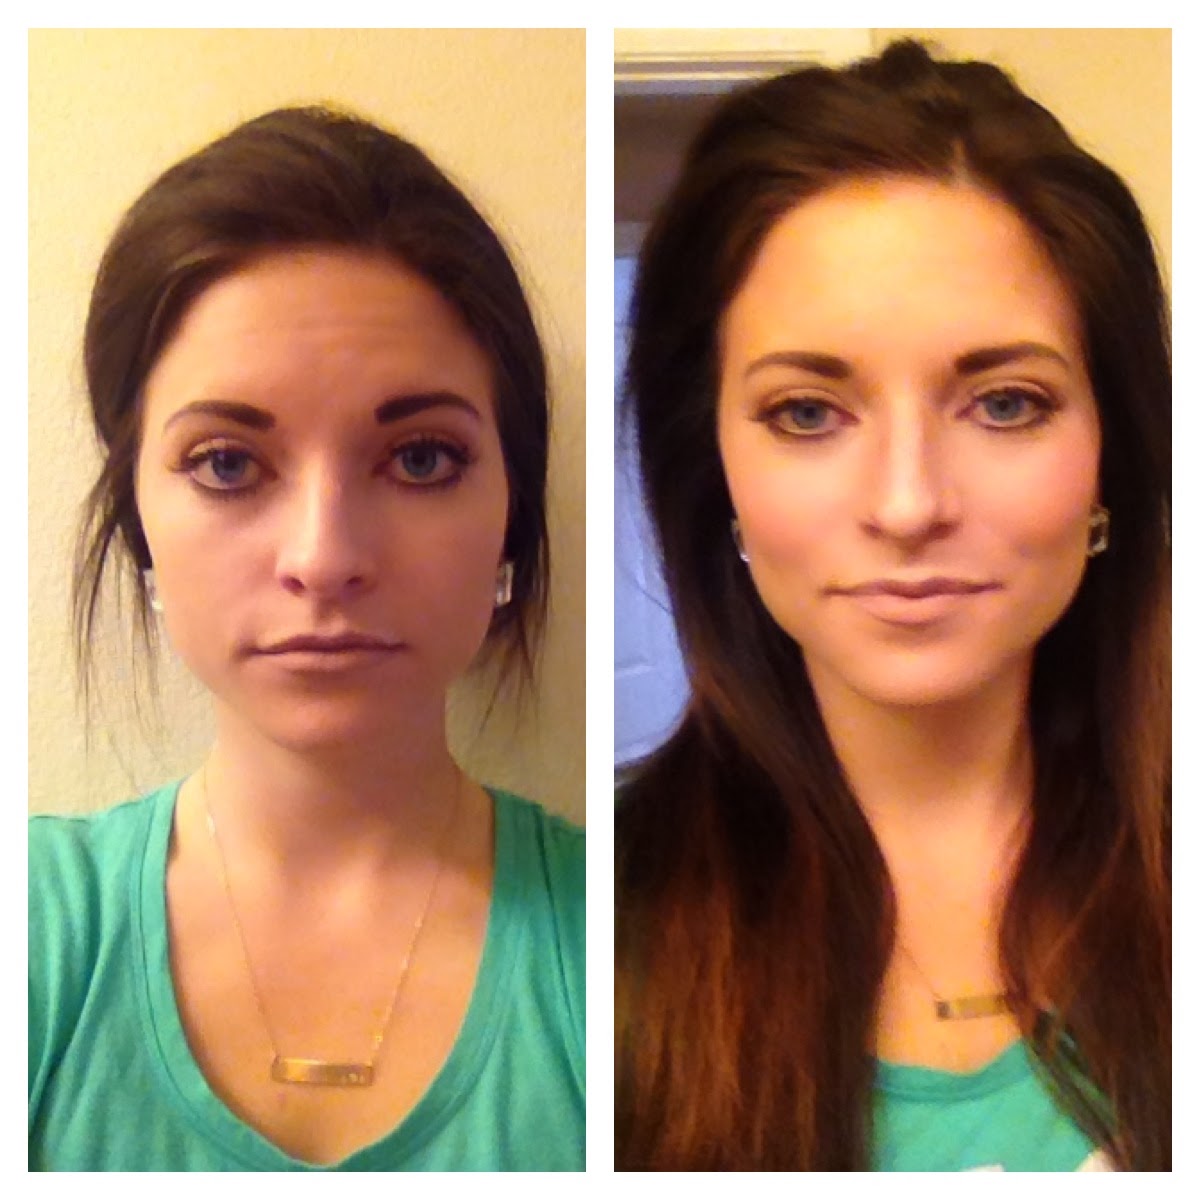 before & after ^
(my forehead looks orange in these from my terrible bathroom lighting but I promise it is the same shade as the rest of my face. haha)
before & after ^
AND YOU ARE DONE!
Any questions? Comment below and I will try to answer them!
Alright, I am DONE taking "selfies" for the day...phew! I hope these tips helped..now go try it out and see what you think!
ALEXA

different lighting to really show the shadows the contouring makes! Notice under my cheek bone how it created a shadow making my jawline look more slender. I LOVE CONTOURING! haha
Loving this lex! You're so gorgeous...I have been reasearching this a ton and playing with it but thanks for helping! I'm not very good with makeup :/ also how about a post on eyebrows? Love ya, jess
ReplyDeleteThanks so much for this tutorial! I'm still trying to find the right highlighter and contourer (I have dry skin in a difficult shade to match- currently trying Dermablend foundation). I can't wait to find one and give this a shot!
ReplyDeleteFace Shape AI gave me one of the most accurate analyses I’ve tried.
ReplyDeleteIt instantly scanned my face and matched the shape perfectly.
I’d definitely recommend it for anyone looking for personalized styling ideas.